How to Make A Watermark In Photoshop in 5 Simple Steps
Learn how to make a watermark in Photoshop with this simple step by step guide - along with a video tutorial for those who prefer to watch!
For any images you want to put online, you are probably going to want to create a watermark to your images. The good news is you can easily make a watermark in Photoshop, and just in a matter of minutes, and that’s what I’m going to show you today!
A watermark helps protect your images, to make it difficult for anyone to use them without your permission (and also so that everyone knows who took that gorgeous photograph!) so it’s worth taking the time to do it if you post your images publicly.
(And If you are in business, a watermark can also be a great way to help market your business for free!)
Read on for your step by step guide on how to make a watermark in Photoshop - and if you prefer to watch, scroll right on down to the end of the post where you can watch a video instead :-)
Photoshop will then go ahead and do your bidding, creating a blank document for you, at the size you specified, and with that super important transparent background.
This is what you will have now:
Step 2: Add Your Watermark Text
Next, add your text to the graphic. Do this by selecting the Type Tool, and then choosing the appropriate colour, font, font size and font style - for example, bold or Italic.
It’s entirely up to you if you want to include colour in your watermarks - traditionally these are in shades of black, white or grey (so that the colour in your watermark doesn’t clash with any colours in the image) but feel free to experiment!
When you have made your selections, just click, hold and drag to get the area you want the text to appear in, then start typing!
Step 3: Add Graphic Elements to Your Watermark
You can now add in any graphic elements to help you create your watermark.
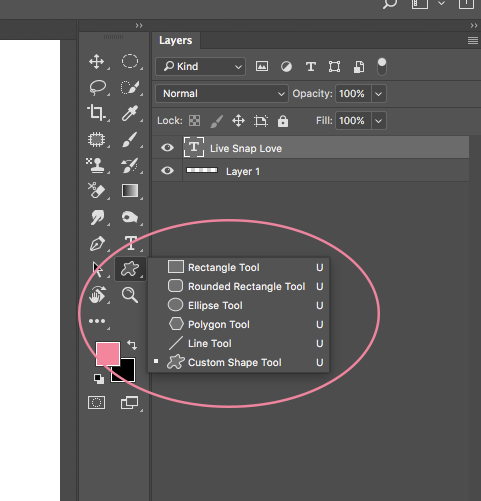
A simple way to do this is to select the Shape tool, and use this to create rectangles, rounded rectangles, circles and so on.
In my example below, I’ve created a very simple camera shape by using these basic elements (just scroll down a couple of steps to see it!
There is also more shapes locked away in Photoshop that you can use!
Click on the custom shape tool option, and you will find a wealth of other shapes such as frames, leaves, arrows and more, so the world is your oyster.
Again, you can change the colours of these to suit your own requirements, just go to the top left on Photoshop, and clicking on the coloured box you see there. You can choose a “fill” colour and also an outline colour “stroke”.
(If you don’t want to have a different outline colour to the fill colour, just choose the option with the red line as shown below)
Step 4: Change watermark opacity to suit
You can also make all, or just some parts, of the graphic see through, simply by changing the opacity. Click on the “layer” you want to make more transparent and move the opacity slider to the left.
In this example, I have made just the text part slightly see-through.
Step 5: Save your finished watermark as a PNG
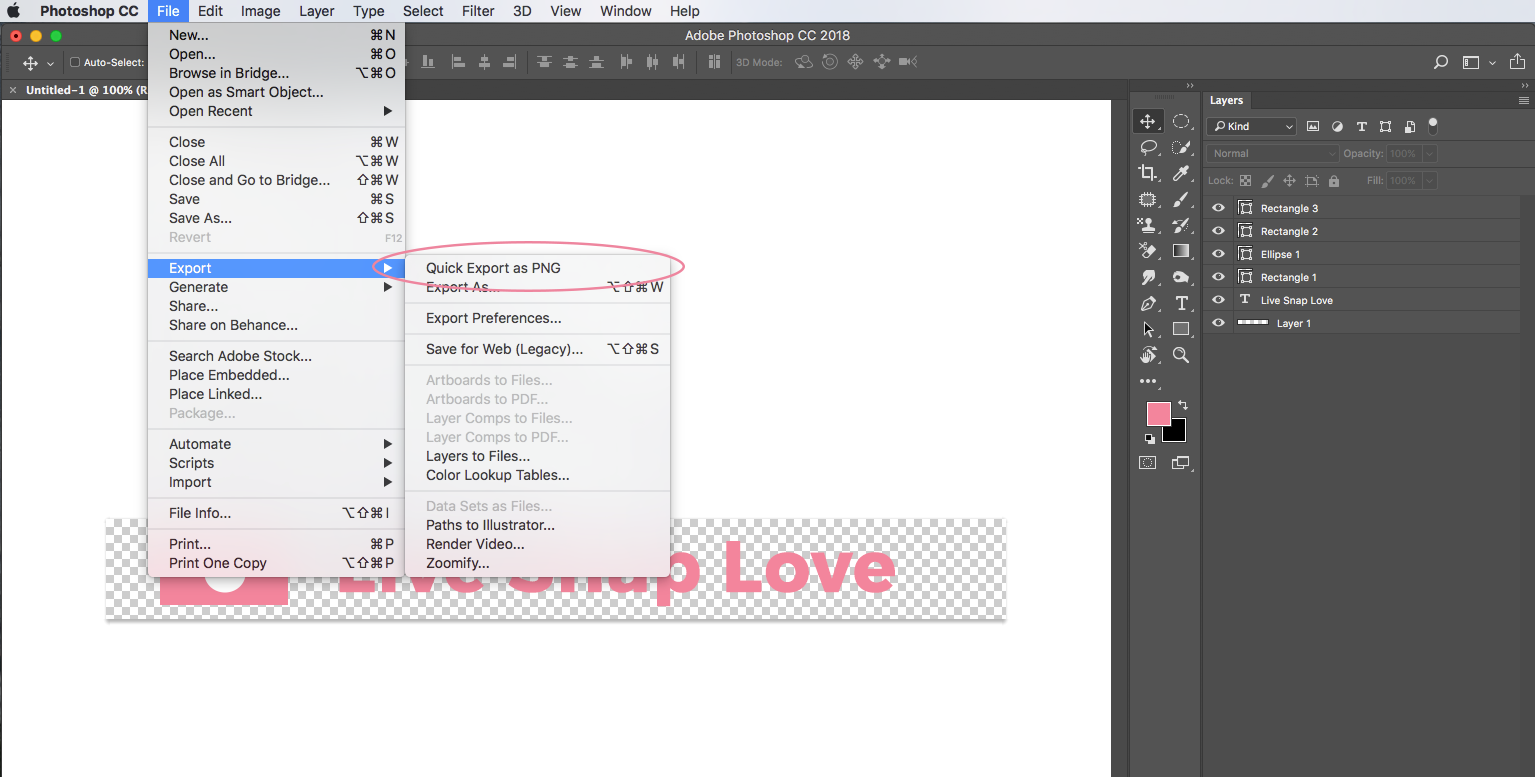
Once you are happy with your created watermark, you will need to export this as a PNG file (exporting as a PNG rather than a JPEG will retain the transparent background we created!)
Simply go to File, then Export, then Quick Export as PNG.
Then choose where to save the file as normal.
Ta da! You have now created a watermark in Photoshop!
Here’s mine:
I also recommend that you save this as a PSD file so you can go back in and make changes to it at a later date.
Now take action!
Follow the steps above to create a watermark in Photoshop, then after you have saved it as a PSD file, and a PNG file, create your own brush preset so you can just “stamp” it on to your images.
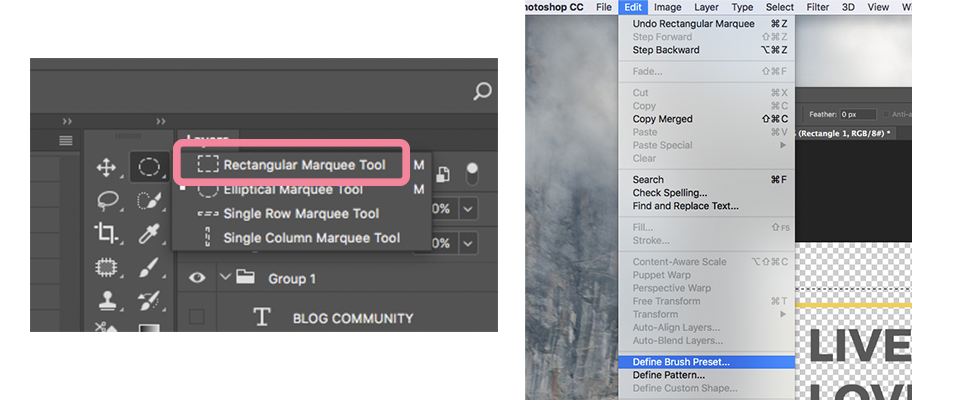
It’s really quick to do: simply select the Marquee tool from the toolbar, and make a selection around your watermark.
Next, go to Edit on the top toolbar, and then scroll down until you see Define Brush Preset. Select it, then name your brush as your watermark.
That’s it! Your watermark should now be in your brush catalog, so when you want to add your watermark to an image, all you need to do is select your brush tool from the toolbar, then choose your watermark and “stamp” it on.
As I know many people prefer to watch instead of read (or most often, have both!) here's a video showing you the above steps in action.
Please let me know how you got making your watermark in Photoshop - I’d love to hear from you! Let me know in the comments below.
And if you want to keep this tutorial for later, or share it, make sure you pin it to your Pinterest boards and share the love <3
Before you go, don’t forget to download my FREE Photoshop Starter Kit. This perfect-for-beginners has a little bit of everything to get you going, including guides to layers, levels, saving, plus a little clutch of actions for you to use (including my perfect for online sharpen and resize action) Enter your details below, and I’ll send all the free goodies direct to your inbox!


