Framing In Photography (with Examples and Ideas!)
Wondering what framing in photography is, or simply want some examples for how to use frames in your composition?
Then you’re in the perfect place, because that’s what we’re going to cover today: what framing is and how to use it, along with plenty of examples and ideas for you, so you can put it all into practice (immediately 😉 )
So what is framing in photography?
Framing in photography simply refers to a compositional technique that helps bring attention directly to your subject, by blocking off part of the image to form a frame around a point of interest in your photo. It’s main goal is to draw the viewer’s eye to what’s most important, but it also works by making the scene look more interesting too, which makes the photo more compelling!
Using frames for composition will also help bring a sense of depth in your photos, which is a great thing to do in photography, because it creates a more three-dimensional feel (no mean feat since the camera flattens the world - our job is to bring back that depth!)
Composition is one of the 5 key pillars of our Auto to Awesome program, because using interesting compositions can elevate an snapshot into something so much more compelling and engaging. Although framing is just one of a multitude of ways to compose your images, it’s a fantastic one to use, and it’s pretty darn easy to do!
So Let’s turn our attention first at the different ways we can incorporate framing in our composition, before looking at some examples.
There are no real rules when it comes to using framing - you can have an picture where there is literally a four edged frame around the item of interest, but equally you could simply have something on one side of the image that is subtly helping bring focus where you want it, so it’s insanely versatile!
The good news is, absolutely anything can be used to form a frame (and I’m going to give you loads of examples in just a moment!) but things such as trees, bushes, windows and doorways all work well and are easy to find. Once you have trained your eye for them, you’ll find yourself mentally seeing them everywhere 😉
Finally, they can also be incorporated into all types of photos, for example: portraits, lifestyle or documentary style photography, landscapes, street scenes and so on - yep, literally ANY type of photo can use frames as a compositional tool.
9 Examples of Framing in Photography
Of course, it’s probably more useful to see some actual examples, so that you can see how framing works in practice, but also to give you some inspiration! Then you can go off and put this composition guide to work in your own images.
Below you’ll find 10 different ideas you can try, along with example photos for each one.
#1 - Doors & Windows
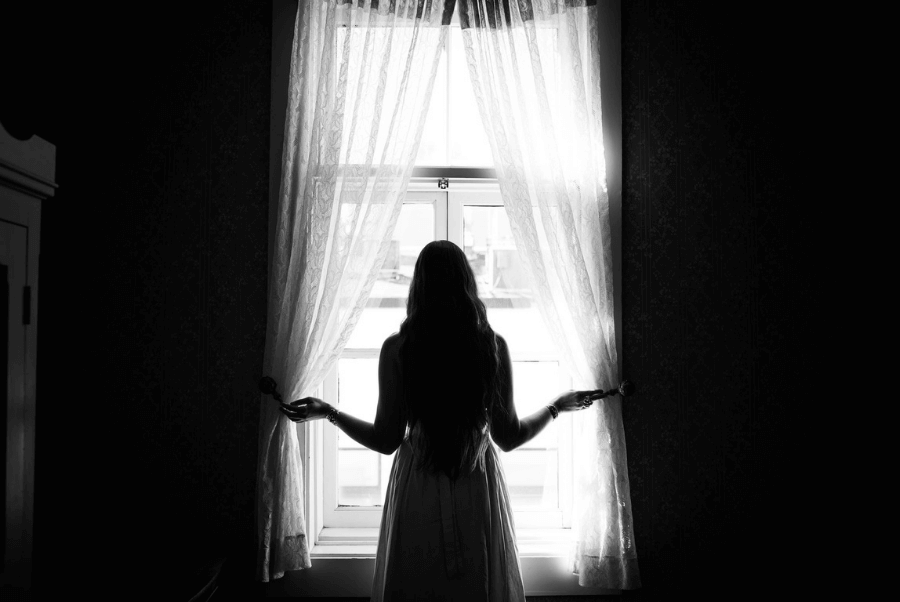
Both of there are a really easy introduction to framing, as they do it so darn well, and you’ll have them in lots of places, including in your home, so they are also easy to find!
You can shoot from inside the door looking out onto the scene outside, or photograph the door from outside to have it surround your subject (this is great for full body shots, or if you can find a big enough door, family portraits!)
The same goes with a window: shooting from outside looking back in gives the appearance of peeking in, or you can frame your subject from indoors looking out, as per the example at the top of this post.
(As a side note, the curtains work as a framing tool too!)
#2 - Trees , branches and bushes
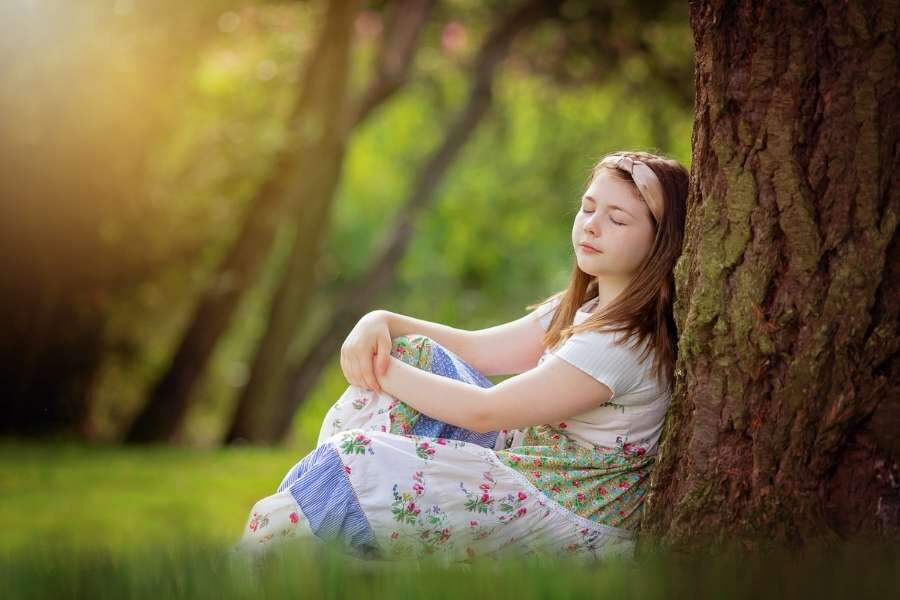
Trees can also create an amazing frame around a point of interest- you could have them on either side of your subject, or you could simply have a single branch overhanging at the top, essentially creating a partial frame.
In this shot below, the girl is framed by the tree trunk on camera right, and the small tree branches to the left.
You can do do the same thing with shrubs, again by having them on either side, but an interesting take on this to have someone peeking through leaves, or just have some leaves or flowers subtly framing your subject.
As a side note, framing doesn’t have to be equal on either side - this image below has a tree on one side, and a bit of a hill on the other, and there is the ground underneath too - these are all working together to create a frame, but none of the individual elements are the same!
#3 - People
Yep, other people can be used too! In the example below, the person on the left (my wonderful husband) is helping concoct a partial frame for Frankenstein (a.k.a my son) but you can do this with random people who just happen to be on the scene - but you may have to wait for the perfect moment to snap the shutter in this case.
This image below is also a good example of having depth in an image, because it has different “layers” - if you want to read more about that, check out this post 3 Simple Ways to Add Depth to Your Photos.
#4 - Archways
You can find arches a lot on buildings, which give another good architectural option for easy framing opportunities, but any kind of opening will work!
In the examples below, the image on the left has the subject framed by both the window, but also by the archway. The image on the right show an open archway framing the beautiful view!
#5- Play Equipment
You’ll often find that equipment in a playground or soft play area can give you a myriad of options for framing if you remember to look for them (not to mention bright vibrant colours which can be great for photos of kids)
In the photo at the very top of this page, a playground tunnel with the subject inside creates a really fun and captivating shot, but there is really is so many options, so keep your eyes open for these when photographing your child!
#6 - Tunnels
You might not find these as easily, but they are also fantastic frames - particularly if you want to create a silhouette shot like the one below.
#6 - Light & Shadow
Pockets of light are another fantastic way to incorporate framing and it’s one that is often overlooked! As the shadows will surround the patch of light, it’s the light itself that becomes the frame for our subject.
Again, you do this in the opposite way too - this example below uses the lines caused by the lamp “glow” to create a partial frame in the image.
#9 - Mirrors
How about using a mirror? It’s another simple way to do it, and you probably already have one in your house somewhere!
It’s also great for camera selfies as you can see :)
#10 - Umbrella
For my final example, I wanted to use a random object - in this case, an umbrella - just to show that you can really can find items to frame your subject just about anywhere.
I’ve seen a frame created just by having two cereal boxes on either side of a child eating breakfast, by using portholes on boats, cave openings, stairways, using legs and arms, curtains, walls, and any two random objects that happened to be in the scene! You can honestly find options for framing just about anywhere, so you are only limited by your imagination.
Let’s take action!
Want to give framing a try? Then the easiest thing to do is to first look around your home and see what you have available that could work as a frame - you are bound to have windows and doors, but also look for mirrors, archways, patches of light and so on. Then go out into the garden and see what nature has to give you!
Start by just training your eye to see the opportunities first, then you can begin actively use these in your photos by planning for them - after a bit of practice, you’ll begin to see these naturally.
I hope this post has given you some inspiration of the different ways you can use framing in photography, and that you’re already itching to get out there with your camera and give it a go! If so, please let me know in the comments below - I always love to hear from you and to know whether a post has got your creative juices going!
P.S Don’t forget to pin this to your Pinterest boards too so you can refer to it later for inspiration!


