6 Tips for Beautiful Everyday Life Photography
The main reason I pick up my camera is for everyday life photography - in other words, to capture those beautiful, everyday, mundane moments that make up my day to day life. I want to document “real” life, all the little things that happen in between birthdays and vacations and holidays, that many people don’t take the time to capture (but then wish they did)
If you feel the same way, then you are going to love this post, because I’m going to go through 6 different tips that will help you beautifully capture your own everyday moments .
#1 - Decide on the everyday life moments you want to photograph
Although you can - and will - take many beautiful everyday life images spontaneously, I really find it helps me to have a list of the moments that I want to capture: things that I know that I don’t want to miss or forget. I may not never refer to it very often, but just the process of thinking and writing them down helps me ensure I am documenting the things that are important for me to capture, and it acts as a wonderful source of inspiration.
Everyone’s lists will be different - for example, your list could include capturing the physical details of your children (think kiss curls or chubby toes or a freckled nose), the activities you do regularly as a family, any rituals or traditions you’d like to remember, or even any current favourite foods, people or possessions.
Here's what to do now:
If you are a long time reader of the blog, you’ll know that I love to make my blog posts super actionable if I can, so here’s what I love for you to do now. Grab a piece of paper and simply start to jot some things that you would love to capture about your life at this very moment.
As you go through the list you’ll also start to get ideas about where you could take these images, and what time of day might be best, and what challenges you may have - feel free to make notes about this as you think about them. This helps you be more prepared ahead of time, and helps ensure that your images are a success!
Once you have your list completed, you can move onto the next 5 tips, which will help you beautifully capture it.
#2 - Think Light First, Location Second
This has been my mantra for many years and it has stood me well, so I suggest you use it too 😁
When taking any image, look for the light and how it is falling on your subject first, before you get yourself into a shooting position that uses the light to it’s best advantage.
As this is everyday life photography we are talking about, that doesn’t necessarily mean heading out only in the “golden hour”, or not photographing indoors because you might introduce a bit of noise in your images, it simply means making the most of the light you have available - whatever that may be.
Next time you are taking an image, move around your subject and see whether you can get use the light in a more interesting way - for example by backlighting your subject, incorporating shadows into your images, getting a silhouette, or simply getting into a position where the light is flattering.
As you are going to documenting real life rather than posing, this may mean you moving around your subject, rather than telling them where to go.
BUT, as far as I am concerned there is absolutely nothing wrong with making sure that you set up activities in a room that has the best light, or suggesting that you play in a certain spot in the garden, or timing your shoot so that you have the best light coming in through a certain window in your house, so you do have some control!
#3 - Change out your angles
It can be easy to get stuck in a rut with our photographs, by only taking images from the same viewpoint (usually being eye level with our subject) but simply changing your shooting angle can make a huge difference to your images!
So try not to remain static and stay in one position when taking images - move around your subject and see which different angles you can use. Sometimes you find that by changing your angle you inadvertently find the best way to capture a moment - and that’s often not the angle that you might have first chosen.
Here’s a tip to help you with this:
First take an image from a position parallel your subject, then from one side, then behind, then the other side. Then get up and photograph standing over your subject for a birds eye view, before getting down on the ground and shooting whatever is parallel to you, and then above you. If you are just starting out, this shooting “circle” can be a great way of ensuring that you keep mixing it up.
For sure, some of these will undoubtedly end up in the delete pile, but by the end of the “session”, you will have a range of images that will help communicate your story, and you might just get yourself that WOW image you were looking for!
#4 Capture the details of the scene
Detail shots are simply photographs that tell a story by focusing on just a small portion of the entire scene.
It doesn’t mean you have to take an image with a macro lens, or get into the teeny tiny details of something, just that you have noticed a smaller element that might otherwise go unnoticed.
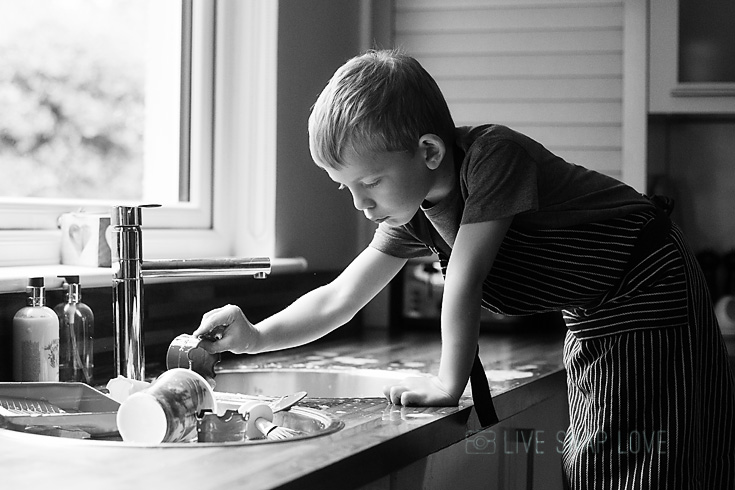
Some examples might be hands holding the paint points, the small toys that your child is playing with, dirty fingernails, the strawberries in the pot ready to make jam, book covers, or as in image the image below, the sneaky little things that your children get up to.
As it’s in these details that many of our everyday lives occur, be sure to get out and capture them!
And if you want some more tips for capturing the details, have a read of this post: 7 tips for capturing the details in everyday life photography for inspiration.
#5 Shoot in Stories
For everyday life photography, there are many times when one image just won’t cut it, because it doesn’t give us the whole picture. So a great way to capture your everyday is to shoot in stories, by taking several images of the same activity or scene.
When shooting any activity, I often think in photo spreads - which images do I need to help tell the story? What elements do I want to remember about the day?
You can do this naturally, just by moving around your subject and changing your shooting angle, and by incorporating some detail shots, as we have just been talking about, but if you like to work to more of a formula, then you can shoot a classic photo essay.
A photo essay gives you a solid framework to shoot to that helps make sure you capture everything, and you aren’t taking ten photos of the same thing and from the same angle.
I have another blog post that goes through the whole 5 step framework, so I won’t go into it here, but if you are interested in learning more about how to take a photo essay for storytelling photography click through to have a read.
#6 Consider Framing As A Composition Tool
Finally, composition is a great way to lift your everyday life photography into something more beautiful and artistic.
Of course there are many different ways to compose your images, but the one I want to bring your attention to here is framing.
Framing your subject is a really useful way to bring your viewers attention to the important parts of the image, while also bringing an extra little element of interest. It’s great for documentary / lifestyle images, because it helps give the viewer that feeling of peeking in on an everyday moment, plus it helps add depth to an image, which in turn helps it feel more “real”
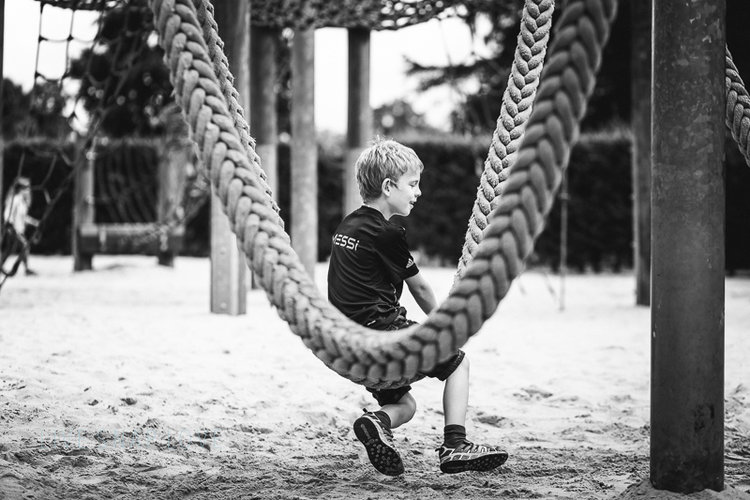
Plus, using framing couldn’t be easier! You simply take elements that are already in the frame, such as foreground or background objects, and use them to create a frame around your subject, like in the image below.
(Want more examples, and some suggestions of things you can use as frames? Then check out this post Using framing as a composition tool here)
Now it’s over to you!
What everyday life moments are you going to photograph?
Or have you had an idea for an image sparked by this blog post?
Then let me know below! I love to hear from you, and of course, you might just help spark an idea for someone else, so leaving a comment helps the thousands of others who visit this blog everyday too.
As always, thank you so much for reading this post and generally for being here. If you have friends, family or colleagues who would find this tutorial helpful, then be sure to share, pin to your Pinterest boards, link back to it from your blog or just otherwise share the love 💖
Before you go, make sure you sign up to our free training “Pro Tricks For Pro Level Photos” and find out exactly how to make your images look more like the pros! I’ll be sharing how to avoid the mistakes most people make along with some of my favorite tricks to instantly up-level your photos! Click here to learn more and save your seat!


