
Christmas Light Photography (3 Ways to Photograph Christmas Lights!)
Learn Christmas light photography with these 3 ways to photograph Christmas lights in and around your home!
So we're getting into the holiday spirit here at Live Snap Love, because today I'm going to teach you how to photograph Christmas lights, by showing you three different ways that you can capture Christmas lights in and around your home!
This is based around photographing the Christmas lights in your home, which means you don't even have to leave the warmth of your house to go outside if you don't want to, but if you do, you can use these exact same tips and steps for photographing Christmas lights outside too.
Just click play on the video to watch, or if you prefer to read, keep on scrolling for the written version! You can also find links to the resources mentioned in the underneath the video too!
Grab your Manual Mode Cheat Sheet here!

Resources and Links Mentioned:
💫 Star Filter mentioned in video.
👉 "How to Get A Blurry Background in Photography"
➡️ "Why are my photos grainy (and how to fix it) "
#1 Making Christmas Lights Twinkle!
First up in our Christmas Light photography list is to make any points of light into a star, just like you can see that in this example below:

Any points of light that you have, for example, the lights on your Christmas tree, they are going to turn into star bursts of light. Now there's two ways to get this. One is by using a filter, and the other is by using your camera settings.
So let's start with how to do this using your camera settings.
Getting star bursts using your camera settings
So the trick here is to use a small aperture with a large F number. So you want to be using something along the lines of F22. (So anywhere from F16 to F 32 but around about F22 will be fine!)
When you have that really small aperture that's going to give you that bursts of light wherever you have points of light. So for all the lights on your Christmas tree, they're going to turn into that little star lights.
To set your aperture set to F22 you obviously need to take control of your camera to do this. so you can shoot in manual mode that’s ideal, go shoot in manual. That has the added bonus of helping you with all your other settings as well!
(You can download a manual settings cheat sheet here !!)
So you definitely want to be shooting in either manual mode or aperture priority mode so you can choose your own aperture number.
Getting star bursts using a filter
So the second way of doing this is to actually use something called a star filter. Now it's just a filter that sits on top of your lens and just threads into it, and they have this kind of little cut marks into it. And what that does is that's going to create those star burst for you regardless of which aperture you use.

So instead of having to use something like F22, you can use something like F4.5 or F 5.6 and you'll still get those star bars of light because the filter's creating them rather than the aperture.
So if you struggle with getting enough light into your camera by using an aperture of F22, then you can buy one of these star filters instead!
Now I have one, and I bought the cheapest one possible, and I have to say the cheaper crappier ones make your images kind of soft. So, if you've got a really sharp L Lens and then you put a $4 crappy filter and top of it, it kind of makes your images much softer. So I recommend is just get one that's a little bit more expensive but you can still pick them up for under $15. Here’s one that I would recommend you try out!
#2 Photographing Christmas Lights By Making Them Out of Focus
So let's move on now to the second way that you can photograph Christmas lights, and that's by making them out of focus.
Now this is a really creative way of photographing Christmas lights that not that many people do, so it’ll give you something that little bit different. And it's really simple to do because all you need to do for this is to set your lens from auto-focus to manual focus!

So on the side off your lens, you'll see a little switch that says AF and MF. All you're going to do is switch it from a AF to MF and that's going to stop your camera from focusing on anything automatically.

So you're just going to set the shot up as norma, but instead of focusing, you're going to turn the focusing ring on your lens and you're going to move that so that the Christmas lights are out of focus.
You can also determine how much you want to be out of focus, so you can just move that ring around until you get that perfect amount of blurriness in your Christmas lights!
#3 Photographing Christmas Lights with Light Bokeh
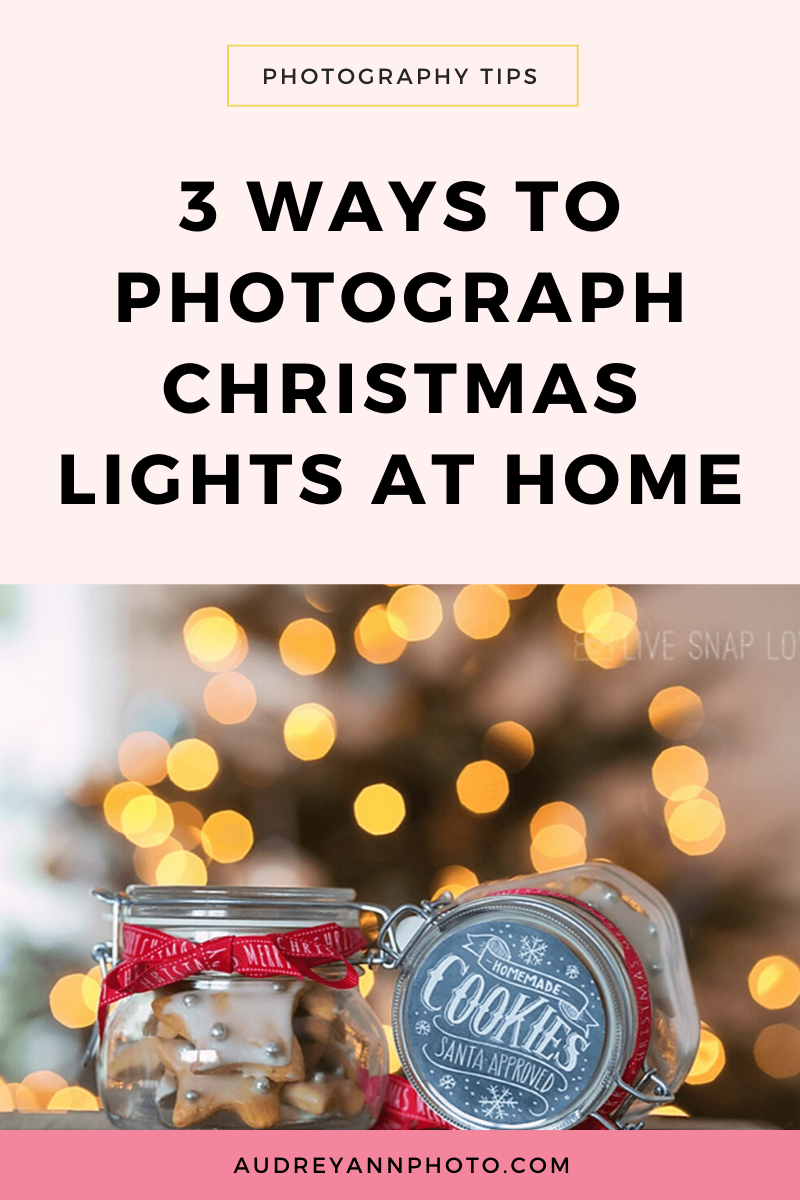
So let's move on now to our third and final way, which is to create light bokeh. And that's when the points of light turn into that small circles of light, like you can see in the example below.

Now you can do this with any subject in front of these circles of light - so as we’ve done here with the jars of cookies, or you can do that with people, an ornament, a Teddy bear, absolutely anything!
You're simply going to focus on the subject and that is going to throw the background out of focus and if you have lights there in the background, they are going to turn into these pretty circles of light.
So to do this, all you need to do is place your subject in front of something that has lots of lights, for example, your Christmas tree, but it could also be a wall of fairy lights. Anything that has has lots of these little points of light. (The more little lights you have, the more of these circles of bokeh you're going to get in the background)

Now again, you want to be shooting in either manual mode or aperture priority mode for this because you want to be able to choose a large aperture. (That's a small F number) That's what’s going to give you this light bokeh!
Now again, remember that we have the manual mode mood cheat sheet that you can download, so go grab it here if you haven’t already, especially if you’re not yet confident choosing your settings!
So for the aperture I would be using something along the lines of around F 2.2 or F 2.8. It really depends on the other factors that affect your depth of field and what you're photographing, but around that amount is going to give you that light bokeh.
Now we do actually have another video and blog post on how to blur the background and you’re gonna use the exact same steps for this - the only difference here is that we're gonna have these lights in the background. So go here to watch How to Get a Blurry Background in Photography as that will help enormously!
Now the other thing you can do with this light bokeh is turn the bokeh into different shapes. So you can choose to turn the bokeh from circles into something like heart shapes or star shapes, like in the example below.
And you can do this just by creating a DIY filter that slips on top of your lens! (Be sure to visit the blog again next week cause I'm actually gonna show you how you make one and you really hardly need anything to do this - just some black paper, scissors and some tape! I’ll come back and update this post with the link!)

General tips for photographing Christmas Lights
So I also promised you some general tips on at your settings for photographing Christmas lights, so here we go!
TIP #1 - USE A LOW ISO NUMBER
So the first step is to use as low an ISO number as possible.
So this is going to help keep your noise and grain to a minimum just so we can get sharper, cleaner photos. Now if you're not sure about grain or noise or how to kind of keep that down to a minimum, we do have another video on that, called Why are my images grainy? which will totally help you out with what noise is AND how to keep that to a minimum.
TIP #2 - USE A TRIPOD
The second tip is to use a tripod, especially if you are using shutter speeds are under 1/ 60 so for example, when you're shooting maybe using that aperture of F22 to get that star lights, the chances are you're going to have to really slow down your shutter speed to let enough light into the sensor to take the image, in which case use a tripod. You're going to find that your images turn out so much sharper.
TIP #3 - do not use your on camera flash.
That is going to ruin any mood or ambiance you can get with your Christmas lights! So do make sure that you have plenty of light when you do this so that you don't have to resort to on camera flash, which leads me onto my next tip, which is….
TIP #4 - experiment between daylight and nighttime shots.
So the easiest way to capture Christmas lights is actually duding the day because you have more light available. So all the images that you've seen here were taken during the day, just because it's just easier to get the settings that you want, but also experiment with taking photos at night. It gives it a different look and feel. But do be aware that you're going to struggle a little bit more to get the settings that you want. So a tripod usually is an absolute must!

Thank you so much for reading and watching and I will see you guys next week when we're back with another Christmas themed video. See you then!


