7 Easy Tricks for Dramatically Improving Your Photos
Raise your hand if you could do with some easy tricks for getting better photos?!
🙋🙋🙋
I know that when you are just starting out - heck, even after you have been shooting for a while - you'd like to know what you should concentrate on first, and what areas will give you the most "bang for your buck" in terms of time vs result.
So that's what I've aimed to do today: give you 7 different tricks that will dramatically improve your photos. Many of these are simple to implement, and even the ones that take a bit longer are SO worth learning about, that I couldn't NOT include them!
As with most of my posts, it ain't short, so grab a coffee, and get stuck in....
(And hey, you might even want to pin this for later too!)

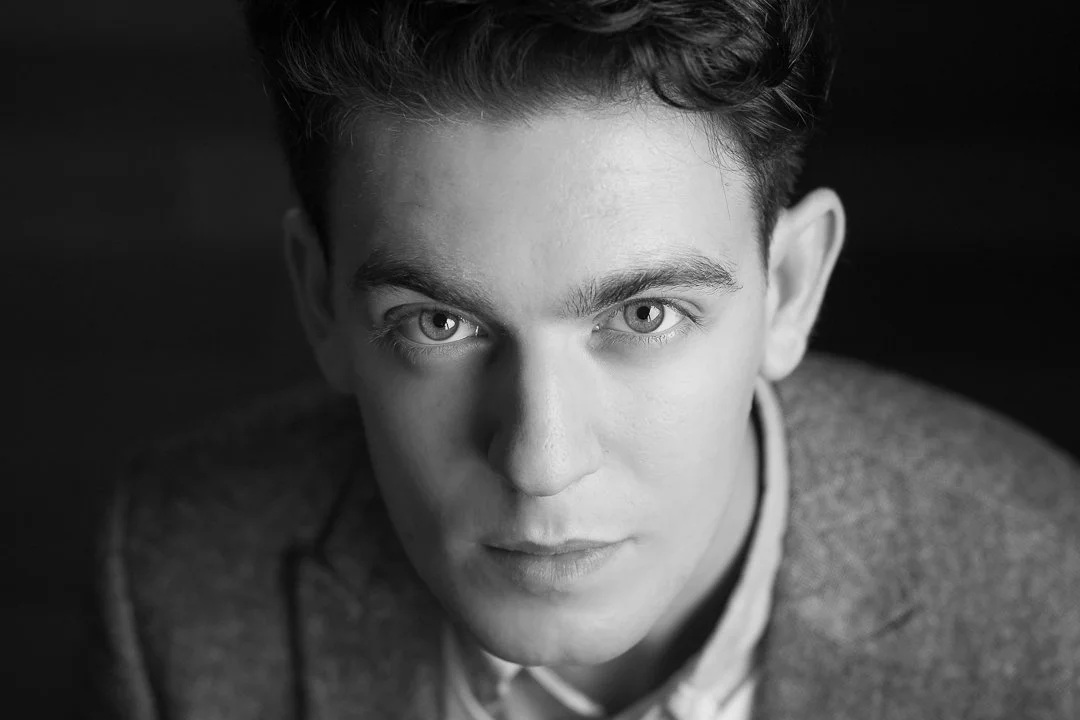
#1 Isolate your subjects by blurring the background
You can drastically improve your images simply by making sure that your SUBJECT is the main focus of the image, and one way to do just that is to isolate your subject by blurring out the background.
This works simply because of the contrast between sharp and soft - the sharp item simply pulls our eye more in the frame!
Try using a larger aperture (smaller F number!) to blur out the background and make your subject stand out. For a single person or object, try something like F2.8 or F3.2. Don't go too low though, as you want to make sure you get everything you want in focus.
You can grab a FREE Aperture Priority Cheat Sheet that will help you know which F-stop and ISO numbers to use, and what to watch out for with your Shutter Speed - along with some tips for getting great background blur! Print it out and keep it handy when shooting so you can confidently set your camera in Aperture Priority Mode! Go here to grab your copy for free!

#2 Move your subject from the centre of the frame
Although centre compositions can work at times, most of the time moving your subject to one side of the frame or the other will give your images a more dramatic look, and a more professional feel. You can use the rule of thirds, or golden compositions or leading lines, but try to get away from a "static" composition into a more dynamic one.

#3 Learn how to use Light
Light is the MOST important element of a photo, as the right use of it can lift the most boring of images into something more artistic and beautiful.......or it can go the other way, and make a photo with the best of intentions into a snapshot. Ouch.
When taking a photo, always look to where the LIGHT is first, and how it is falling on your subject. If you are not too confident about using light, just use your eyes!
If your subject doesn't have catchlights in the eyes, or they have hotspots on their skin, or the light is flat and boring - then you will never have a great photo. The first step in a great image is being to look and actually see what's there, not expecting the camera to magically create a great image that wasn't there to begin with.
(And as a side note - I see a LOT of people adding light overlays to their images in Photoshop in an attempt to cover up for bad light. Remember that this rarely works if the light was bad in the first place - adding a sun glow coming from the side doesn't work if the light is hitting your subject from above!)
Just to get you started, make sure you read this recent post about natural light tips for beginners, which will give you some simple tips about making the most of the light you have.
We also have a whole module devoted to light in my step by step course Auto to Awesome - we go over step by step how to set up your camera, where to place your subject and more strategies for shooting in sunny days, cloudy days, golden hour and indoors - in fact, every type of light you can think of, so check it out if you want to learn more.

#4 Shoot in RAW
Now, raise your hand if you are still shooting in the JPEG format and think for shooting in RAW is just for the pros?
Not true!
The most important time for you to shoot in RAW is when you are learning.
Why? Because that is when you are MOST likely to make mistakes such as under or over exposing, or getting your white balance wrong. A shooting in the RAW file format makes it much easier to fix those mistakes!
In the RAW file format the image is completely unprocessed by the camera, and it is not compressed in any way, so it contains the whole range of light and detail that the camera recorded. So you get a higher quality image, and it can do things like help you recover highlights you thought were lost, change white balance, and fix over or underexposure without mucking up skin tones etc.
If I have persuaded you to ditch the JPEG file and switch to RAW, click here to read a post about how to make the switch from JPEG to RAW.
You'll thank me later :-)

#5 Fix Your White Balance
Getting white balance right in camera is an extra step when shooting but it’s SO worth those extra ten seconds! By setting your own white balance, you'll get rid of all of those wonky color casts that make your subjects look ill (too green) or like a smurf (too blue) or like they have sunburn (too magenta)
Whilst you can always change your white balance later in processing, it’s much easier to get it right in camera, and as exposure is linked to white balance, get a better overall photo.
You can get a range of white balance tools that will help you set your white balance, but if you don't want to fork out for those just yet, you can use your camera's built in presets.
Just click on the WB setting on your camera, and change from Auto White Balance (AWB) to one of the presets, such as sunny, cloudy, lightbulb etc. Simply pick the one that most closely resembles the light you are shooting in and you'll find a more accurate white balance in many cases.
#6 Learn how to do a "clean" edit
If you are comparing your straight out of camera images to a pros and finding them lacking, remember that in the vast majority of cases, all those images you see online will have had some form of editing applied to them.
When you are first starting out, you don't need to know how to do anything drastic - start by learning how to fix those in-camera mistakes we just mentioned!
So learn how to fix your white balance, adjust your exposure, and add a little noise reduction (very useful if you are shooting with a cropped frame camera!) and some contrast and colour saturation / vibrance. (Vibrance for people is best - stops skin from looking too orangey really quickly!)
You can ready about 5 simple ways to enhance your photos in Lightroom if you need a little help in this department!

#7 Expose correctly for less noise
One of the most common complaints I hear from new photographers is that their images have a lot of noise (in other words that speckly grainy stuff over your image) This is especially true if you are shooting with a crop frame camera, as they don't handle noise as well as their full framed big brothers!
Noise is generally created when using a high ISO number, so the first step is to simply use as low an ISO number as you can!
The second step is THE most important one:
Make sure that you expose correctly in camera, even if that means using a higher ISO number. Don't be tempted to underexpose so you can get away with using a lower ISO number, as all you will find is that when you bring up the exposure, the noise is 10 x WORSE! So, expose correctly, and even over expose a little, and that will help you keep the noise levels at a minimum, and in turn, make your image look better and sharper.

Before you head off, don't forget to grab the FREE Aperture Priority Mode Cheat Sheet to help you get gorgeous background blur in your photos!